How to Access Seat Management
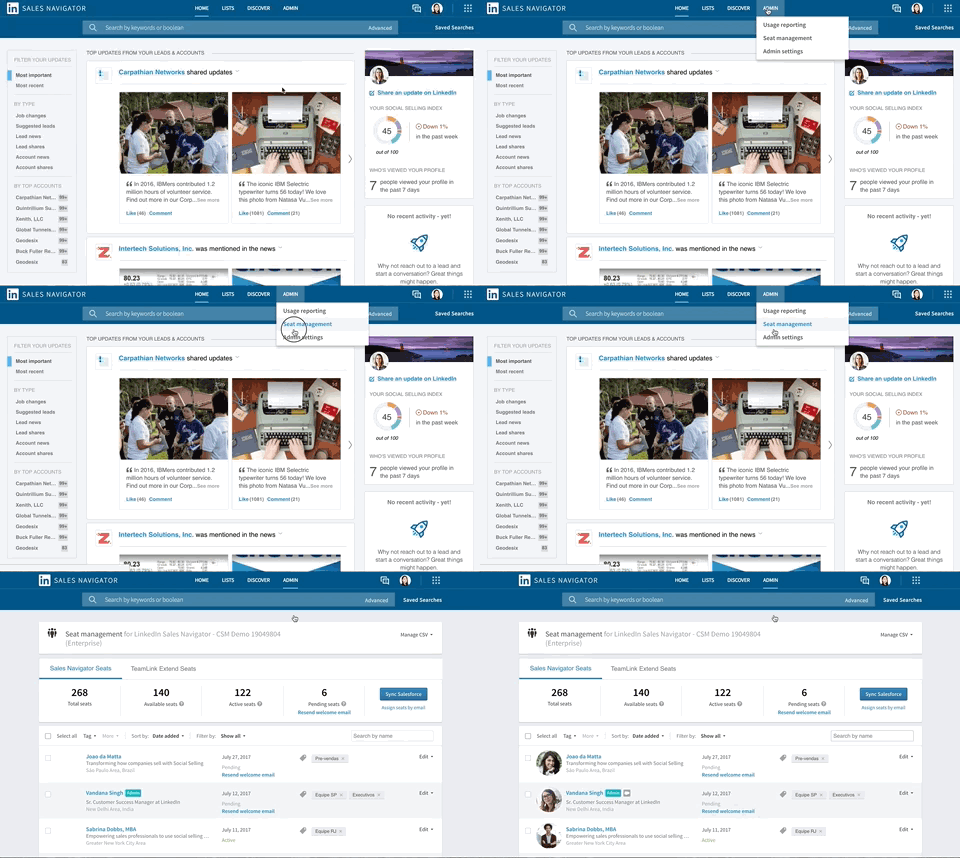
- In Sales Navigator, hover over Admin at the top of the page and select Seat Management from the dropdown menu.
Assign Seats by Email
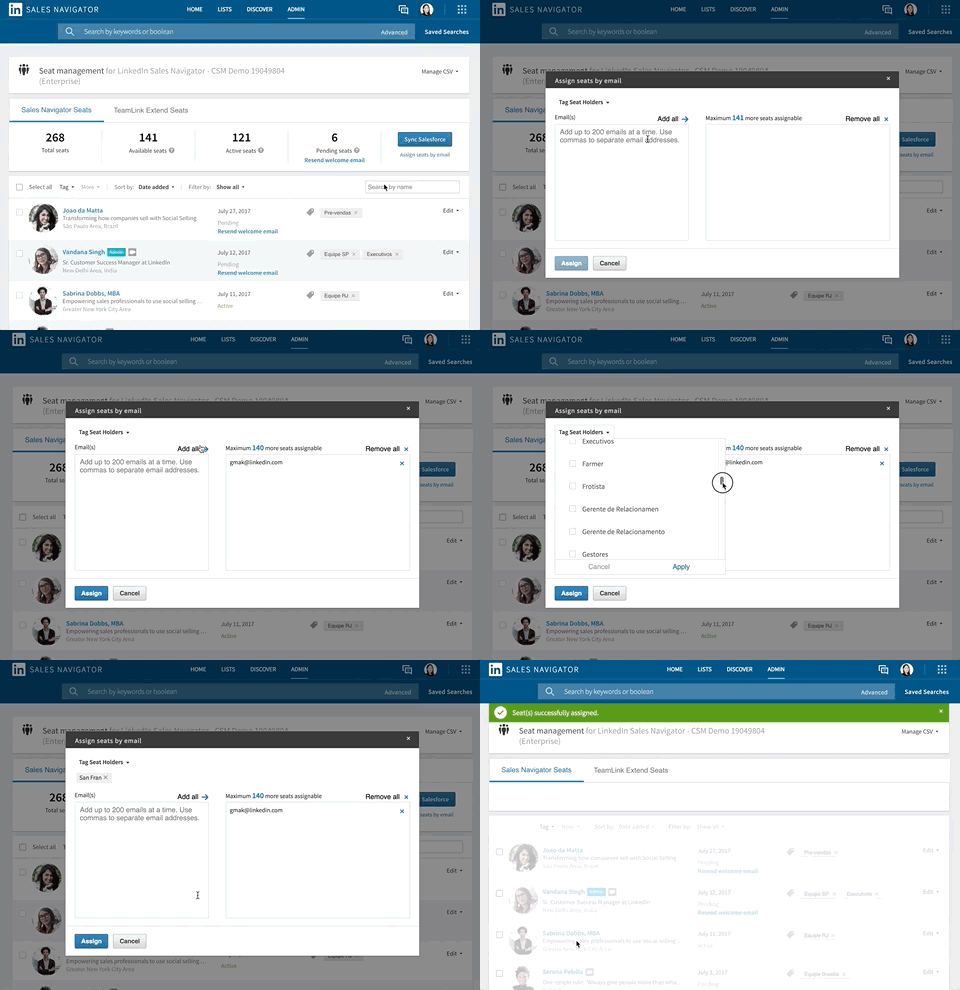
- In the Seat Management page, click on Assign seats by email.
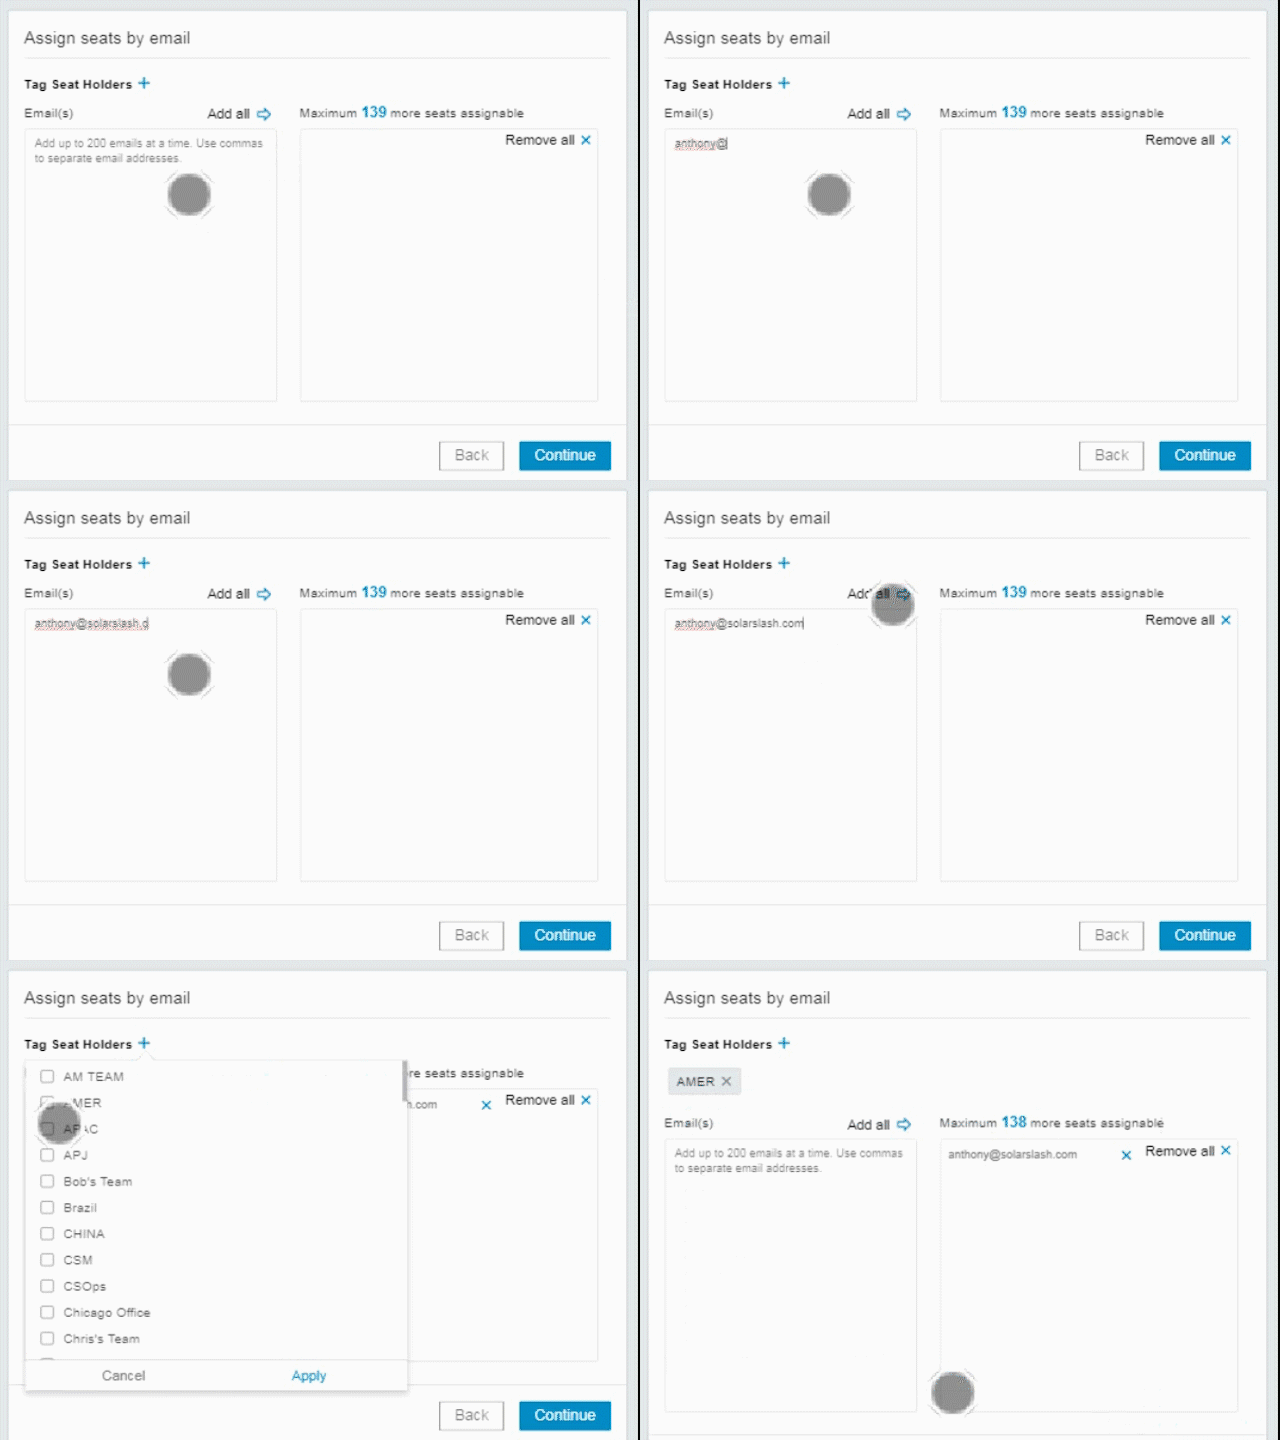
- Type in the email addresses of new seat holders in the Email(s) column.
- (Optional) Tag users by clicking on Tag Seat Holders dropdown menu. Learn more about seat tagging here.
- Click Add to finish.
*Note:
- Make sure to provision Sales Navigator licenses to users' corporate email addresses only, not personal email addresses! (For users with multiple email addresses, use the email address associated with your CRM)
- If the email address you add isn't already associated to their existing LinkedIn.com account, seat holders will be prompted to add and confirm their email address during the onboarding process.
- Seat holders will have the option to sign up for a LinkedIn.com account during the onboarding process, if they don't already have one.
Assign Seats by CSV
*For Sales Navigator Team and Enterprise only.
To create a new CSV file, refer to the following template here.
- Fill out the following columns:
- primary_email_address should correlate to the individual you want to assign a seat to. If the email address isn't associated with their LinkedIn.com account, they'll be walked through the process during onboarding. We highly recommend using the corporate email address of the user instead of a mailing list.
- license_sales_status should be set to active to assign a user successfully.
- In the Seat Management page, click on the Manage CSV dropdown menu.
- Click Import and select your new CSV file to upload. If the Import option is grayed out and unavailable for use, another admin is using the account to upload a CSV file at the same time.


