Note:
Available for Sales Navigator Advanced & Advanced Plus editions, and can only be managed by admins.
TeamLink Extend seats allow companies to increase the size of their TeamLink network by adding the networks of members who do not need full Sales Navigator seat capabilities.
How to Access Seat Management
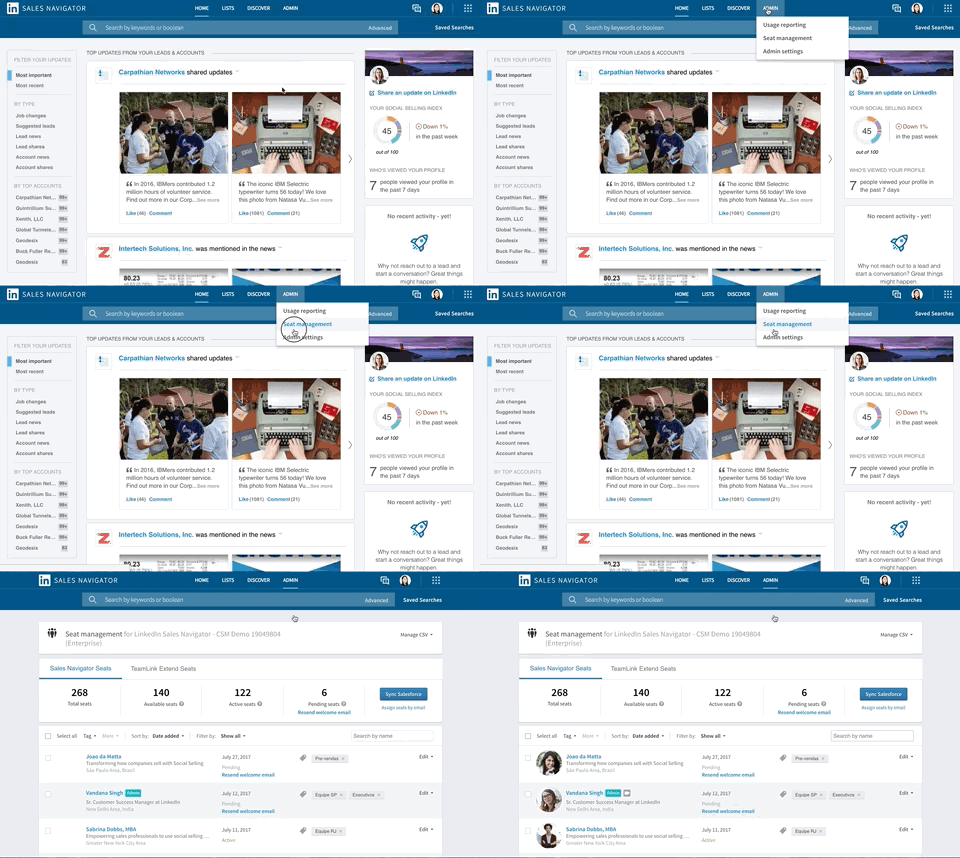
- In Sales Navigator, hover over Admin at the top of the page and select Seat Management from the dropdown menu.
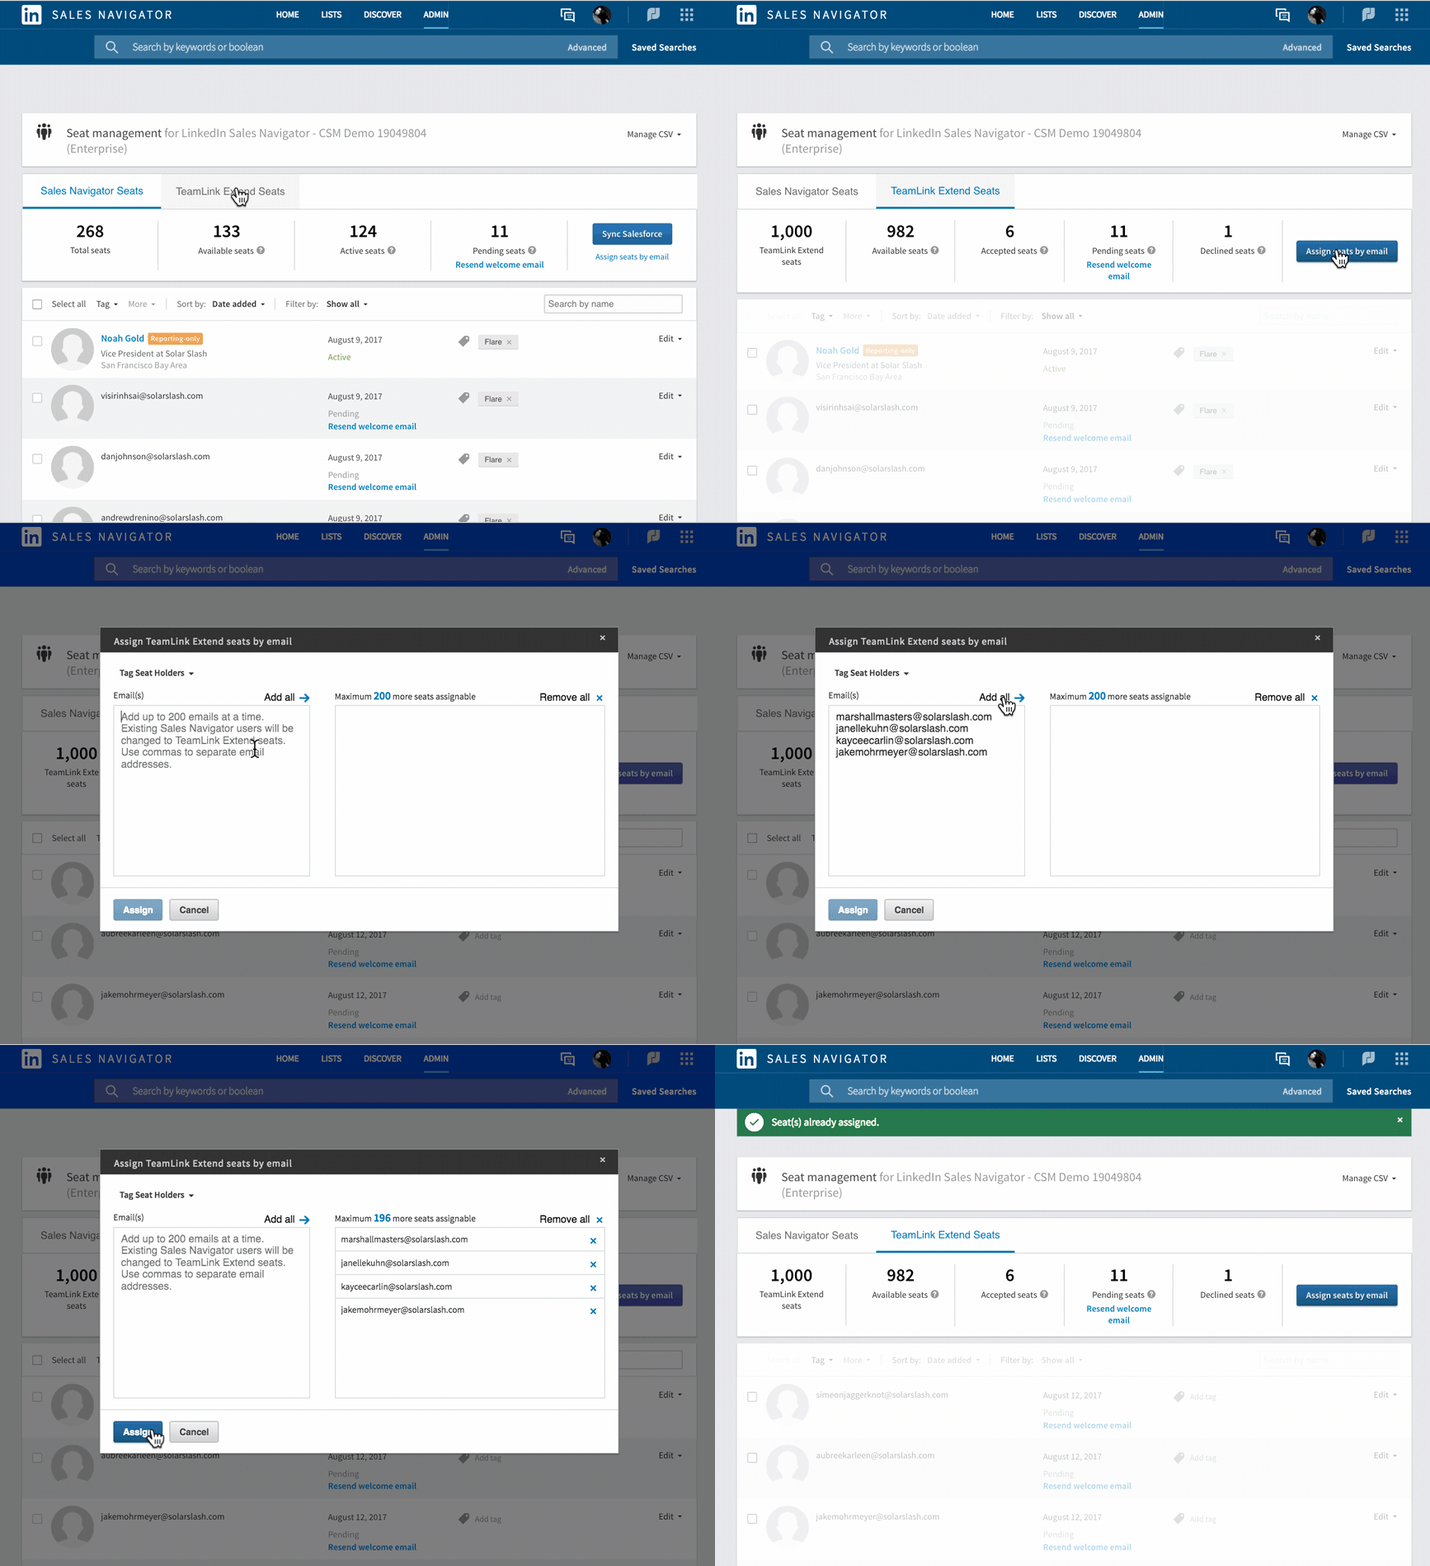
Assign Seats By Email
- In the Seat Management page, select the TeamLink Extend Seats tab.
- Click Assign seats by email.
- Follow the prompts to complete assigning seats.
- Click on Assign.
Assign Seats By CSV Import
To create a new CSV file, refer to the following template here.
1. Fill out the following columns:
- primary_email_address: The email address of the seat holder.
- This must match the email address associated with the seat holder's LinkedIn.com account.
- license_sales_status: The license status of the seat holder (active or inactive).
- license_teamlinkextend_status: This column is only available for Sales Navigator Enterprise. You'll need to add this column to the file template, if you're attempting to add TeamLink Extend seats.
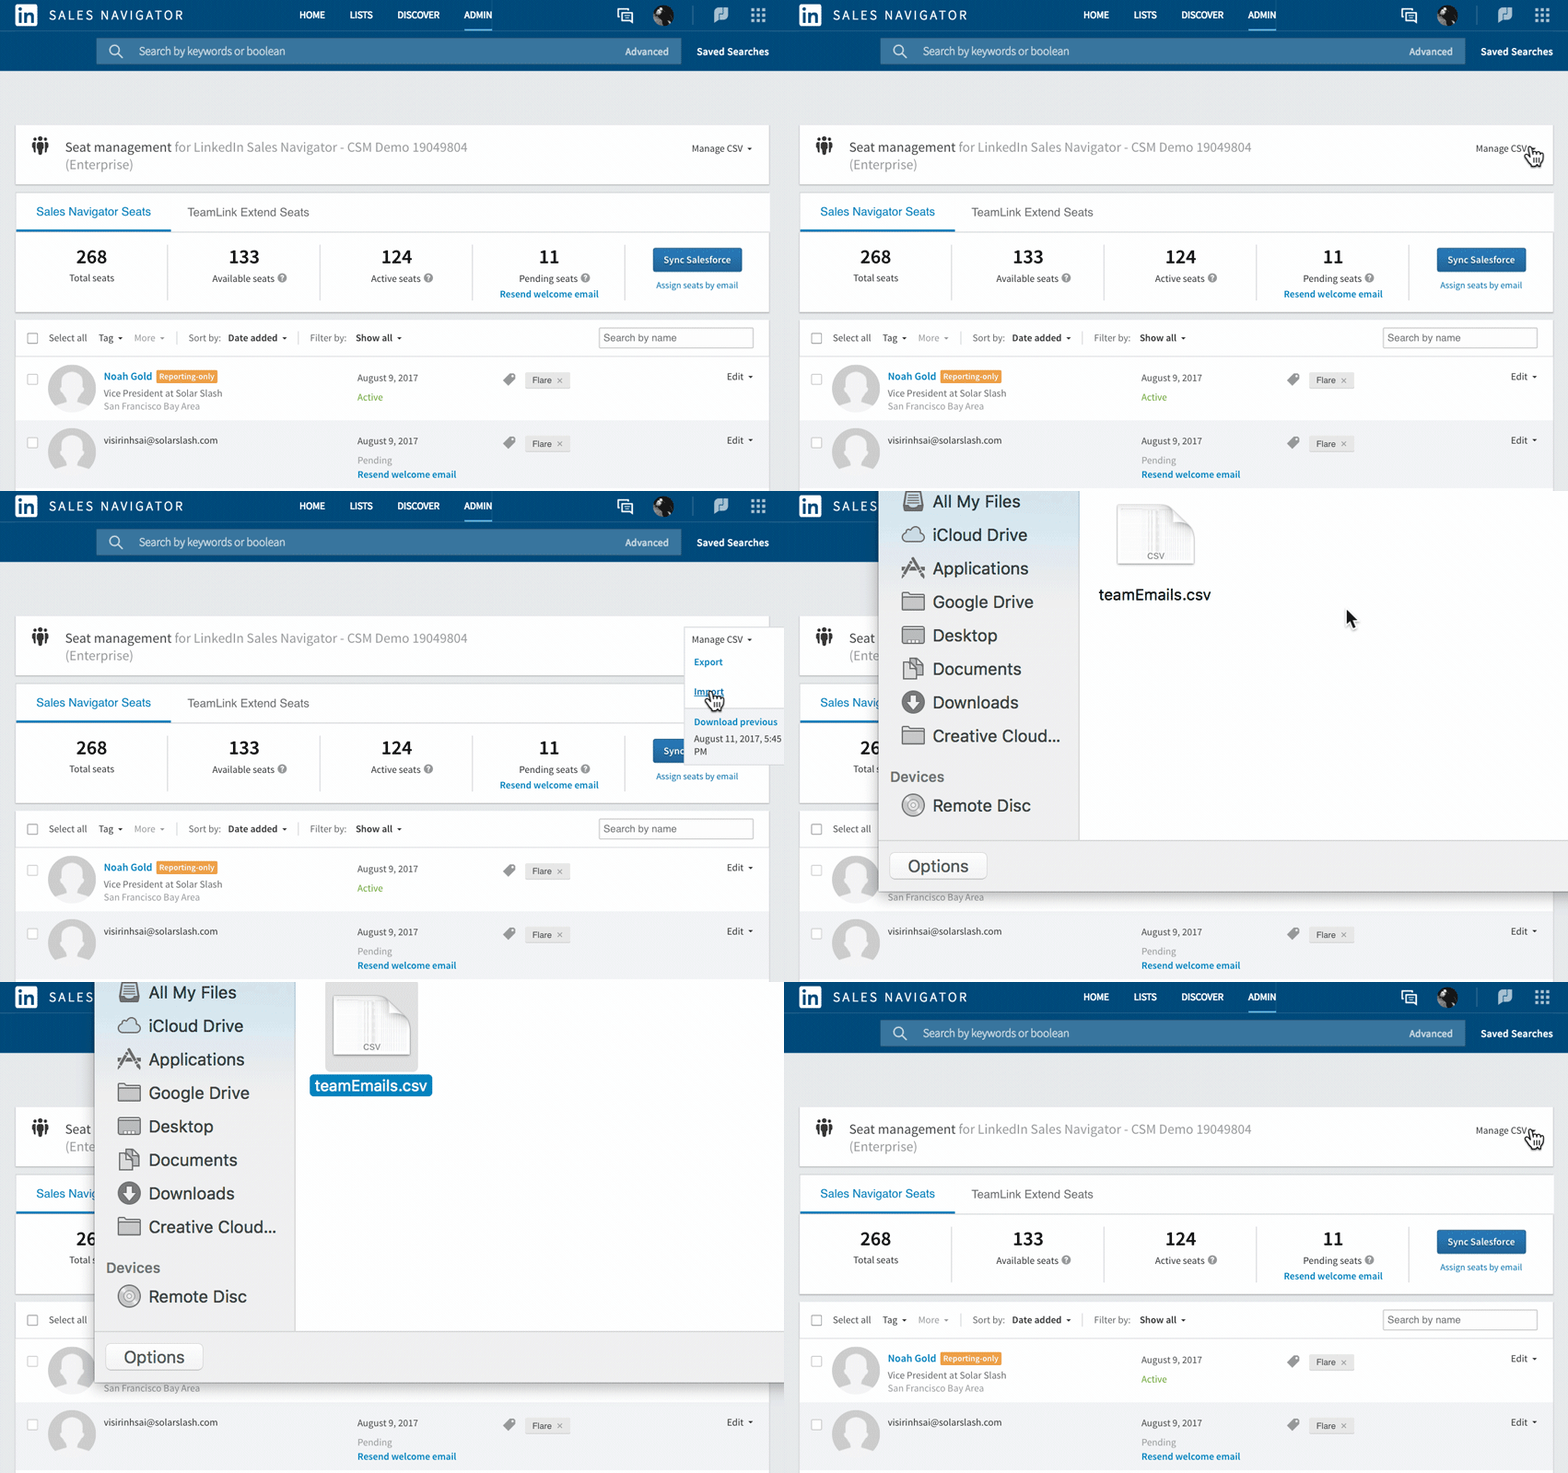
2. In the Seat Management page, click on the Manage CSV dropdwn menu.
3. Click Import and select your new CSV file to upload. If the Import option is grayed out and unavailable for use, another admin is using the account to upload a CSV file at the same time.
What Happens Next
Admins can view the status of TeamLink Extend invites sent:
- In the Seat Management page, select the TeamLink Extend Seats tab.
- Search and select users to view. In their row, you can see their Teamlink Extend invitation status, and resend welcome emails.
Users can change TeamLink Extend settings:
- On LinkedIn.com, the user can click on their profile photo in the upper right corner.
- Go to the Settings & Privacy section.
- Under the Subscriptions section, click on Change near TeamLink Extend, and change TeamLink Extend Settings.


