Note:
- Tags are only visible to admins. Seat holders cannot create, manage, or view tags.
- New tags typically take up to 24 hours to appear in usage reporting.
- Recommended tags include: location, region, role, manager name, business line, etc.
How to Access Seat Management
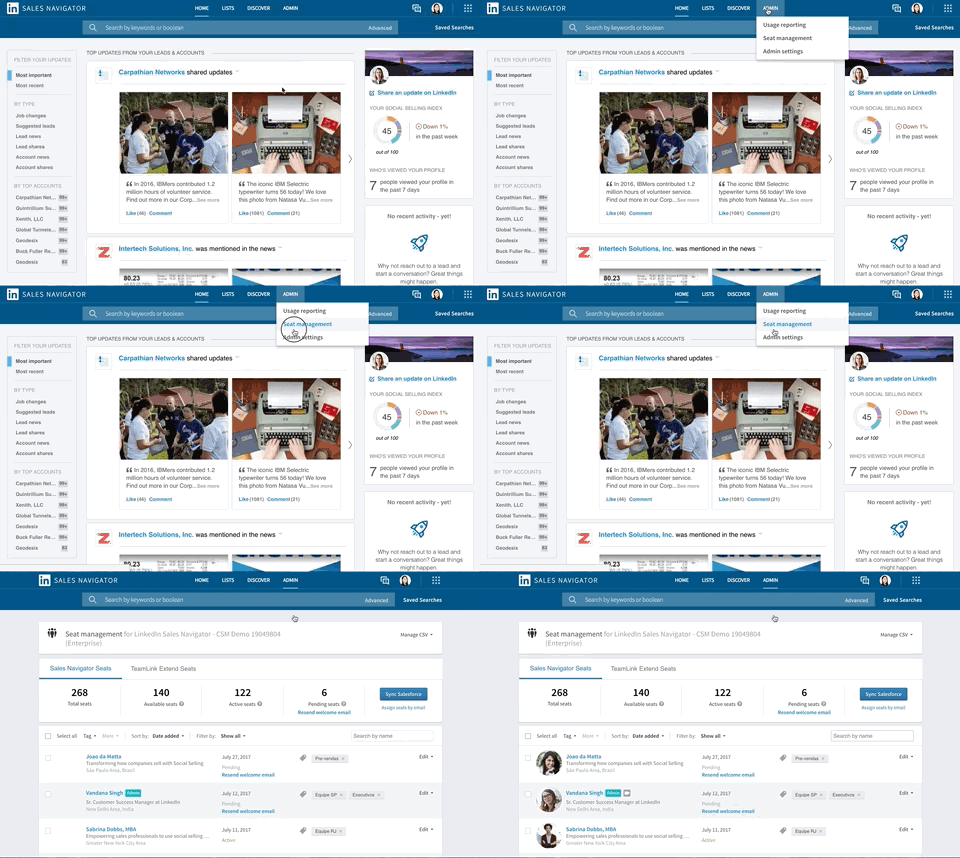
- In Sales Navigator, hover over Admin at the top of the page and select Seat Management from the dropdown menu.
Assign Existing Tags to Existing Seat Holders
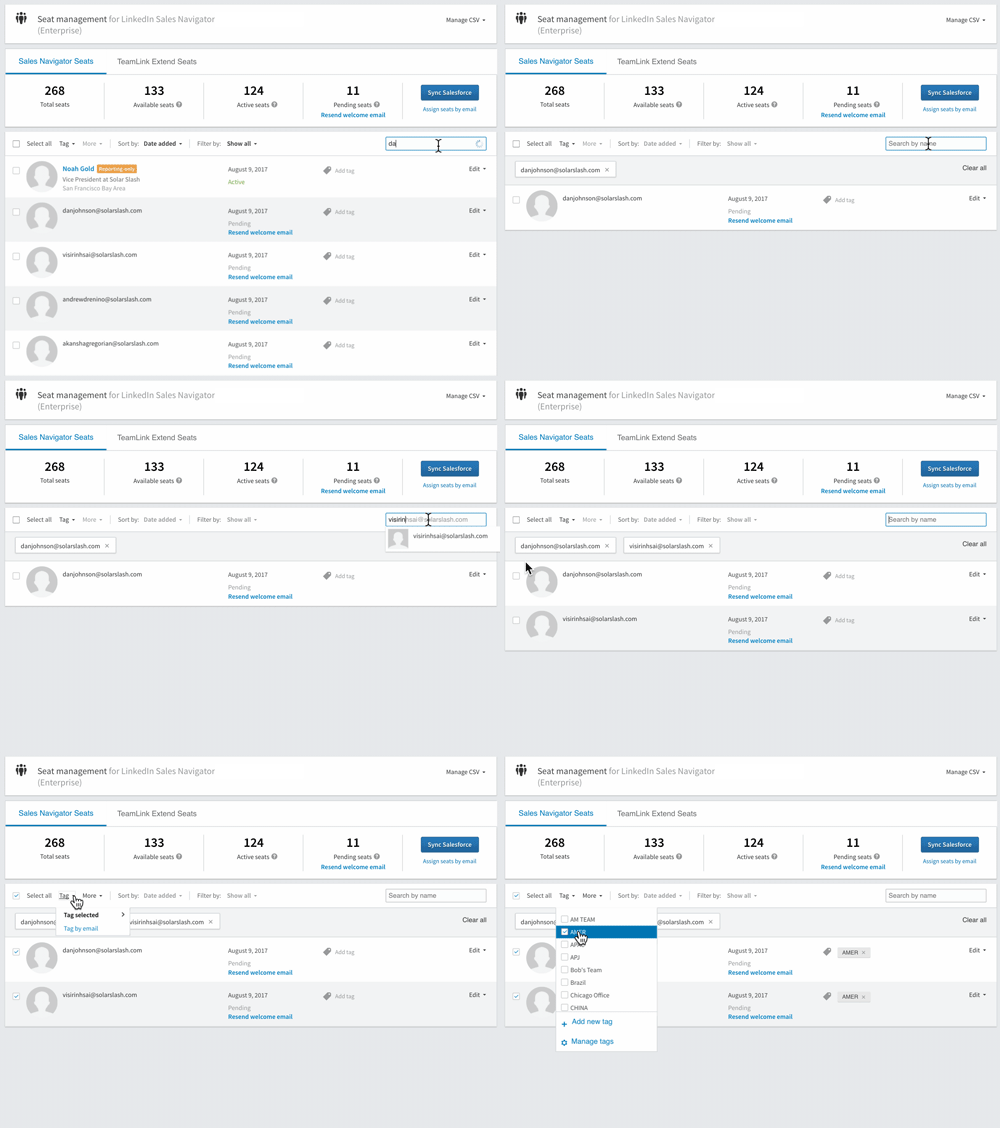
- In the Seat Management page, search and select the seat holder(s) that you wish to tag by checking the box next to their name.
- Click on the Tag icon and a dropdown will appear.
- Select the tag you would like to assign by checking the box next to the desired tag.
Assign Tags in Bulk When Adding New Seat Holders By Email
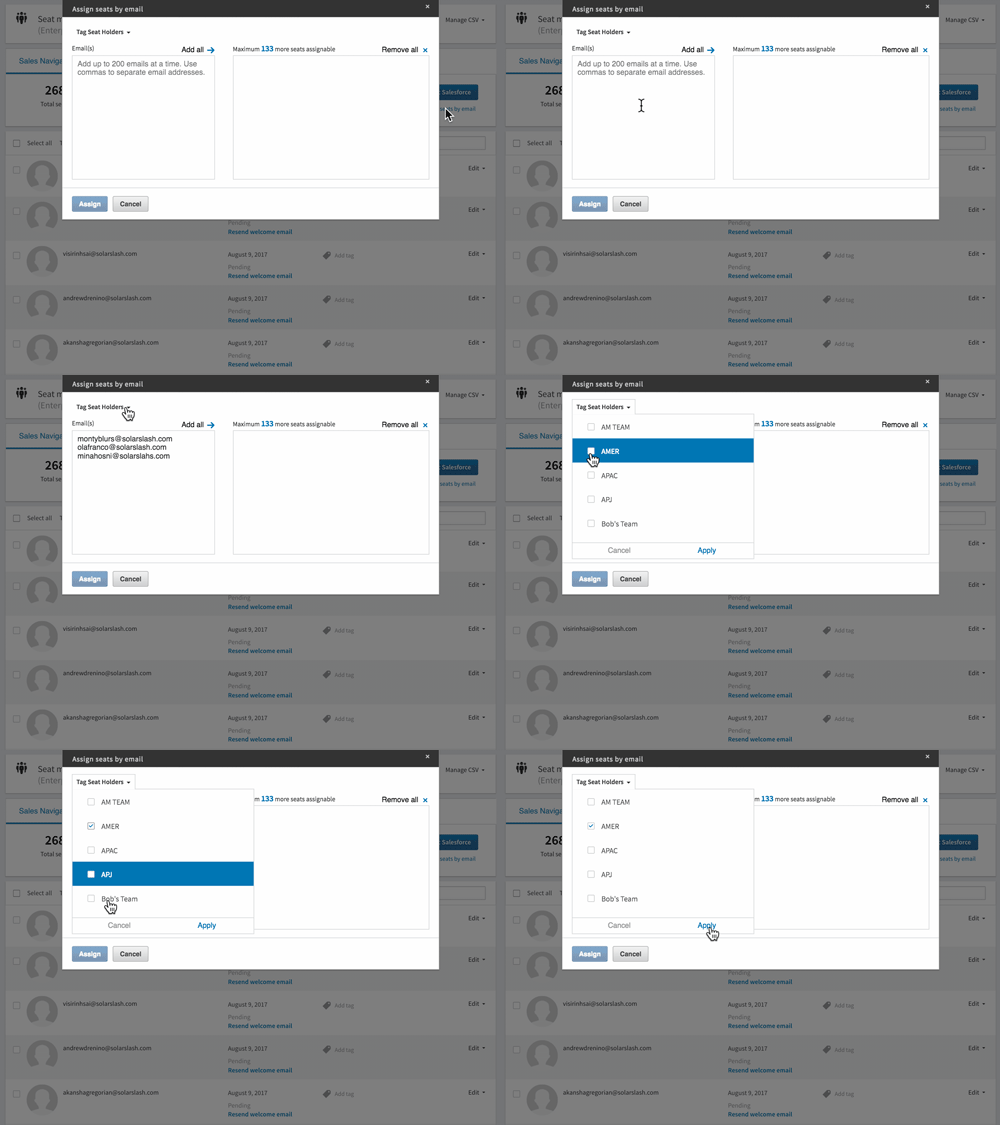
- In the Seat Management page, click Assign Seats by email.
- Enter the email addresses of the individuals that you want to add to your organization's Sales Navigator account.
- Tag users by clicking on Tag Seat Holders dropdown menu.
- Click Assign to finish.
Create and Assign New Tags to Existing Seat Holders
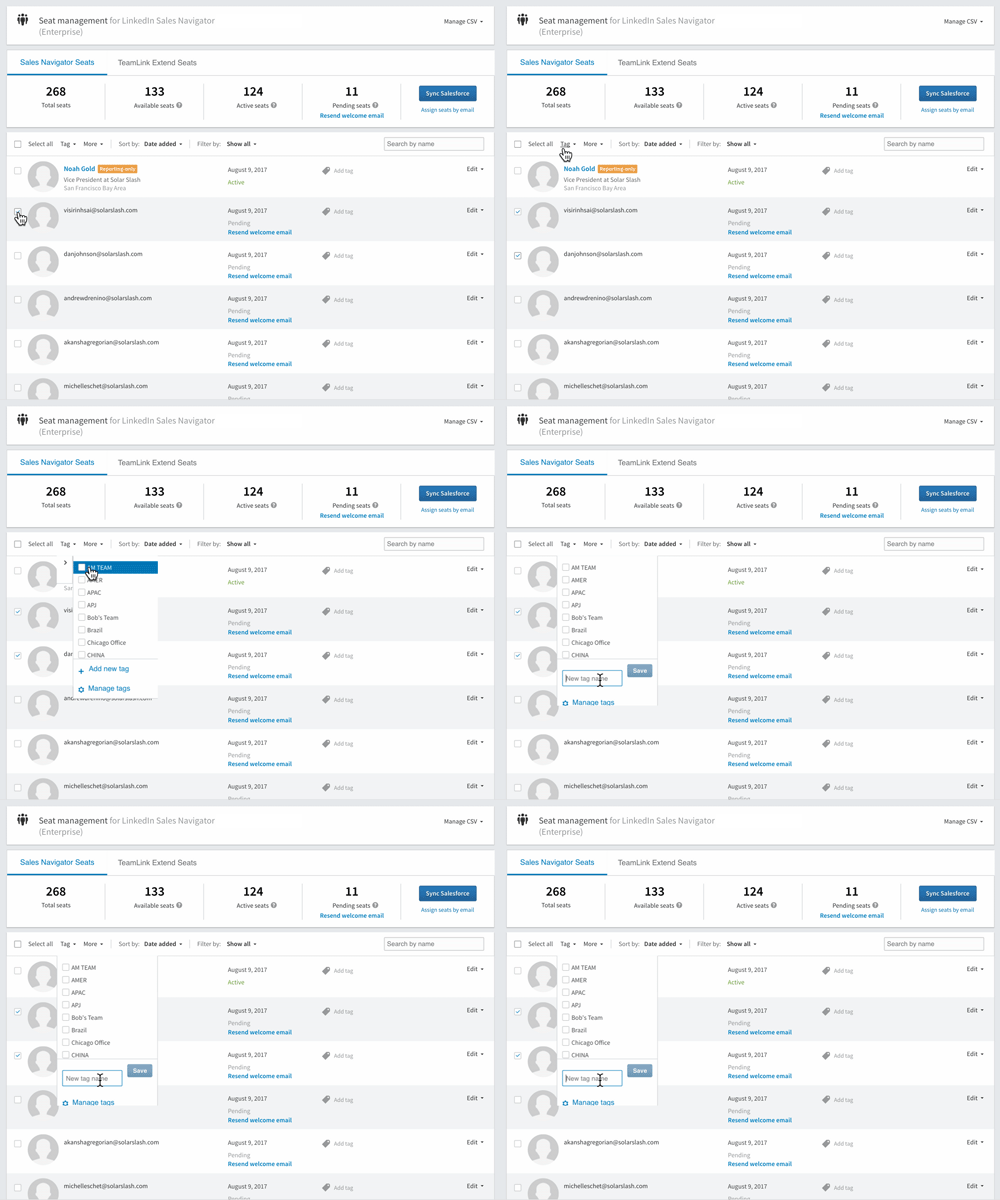
- In the Seat Management page, search and select the seat holder(s) that you wish to tag by checking the box next to their name.
- Click on the Tag icon and a dropdown will appear.
- Click Add new tag, then enter the desired tag in the text box and click Save.
- Select the tag from the list, and then check the box next to the tag to assign it to the selected user(s).


