About CRM Sync
*For Salesforce customers only.
- Save time by leveraging existing users in the CRM to manage and assign seats.
- Drive adoption among users with auto-populated saved leads and accounts.
- Centralize control with Admin initiated CRM sync for your entire organization.
Group Activation
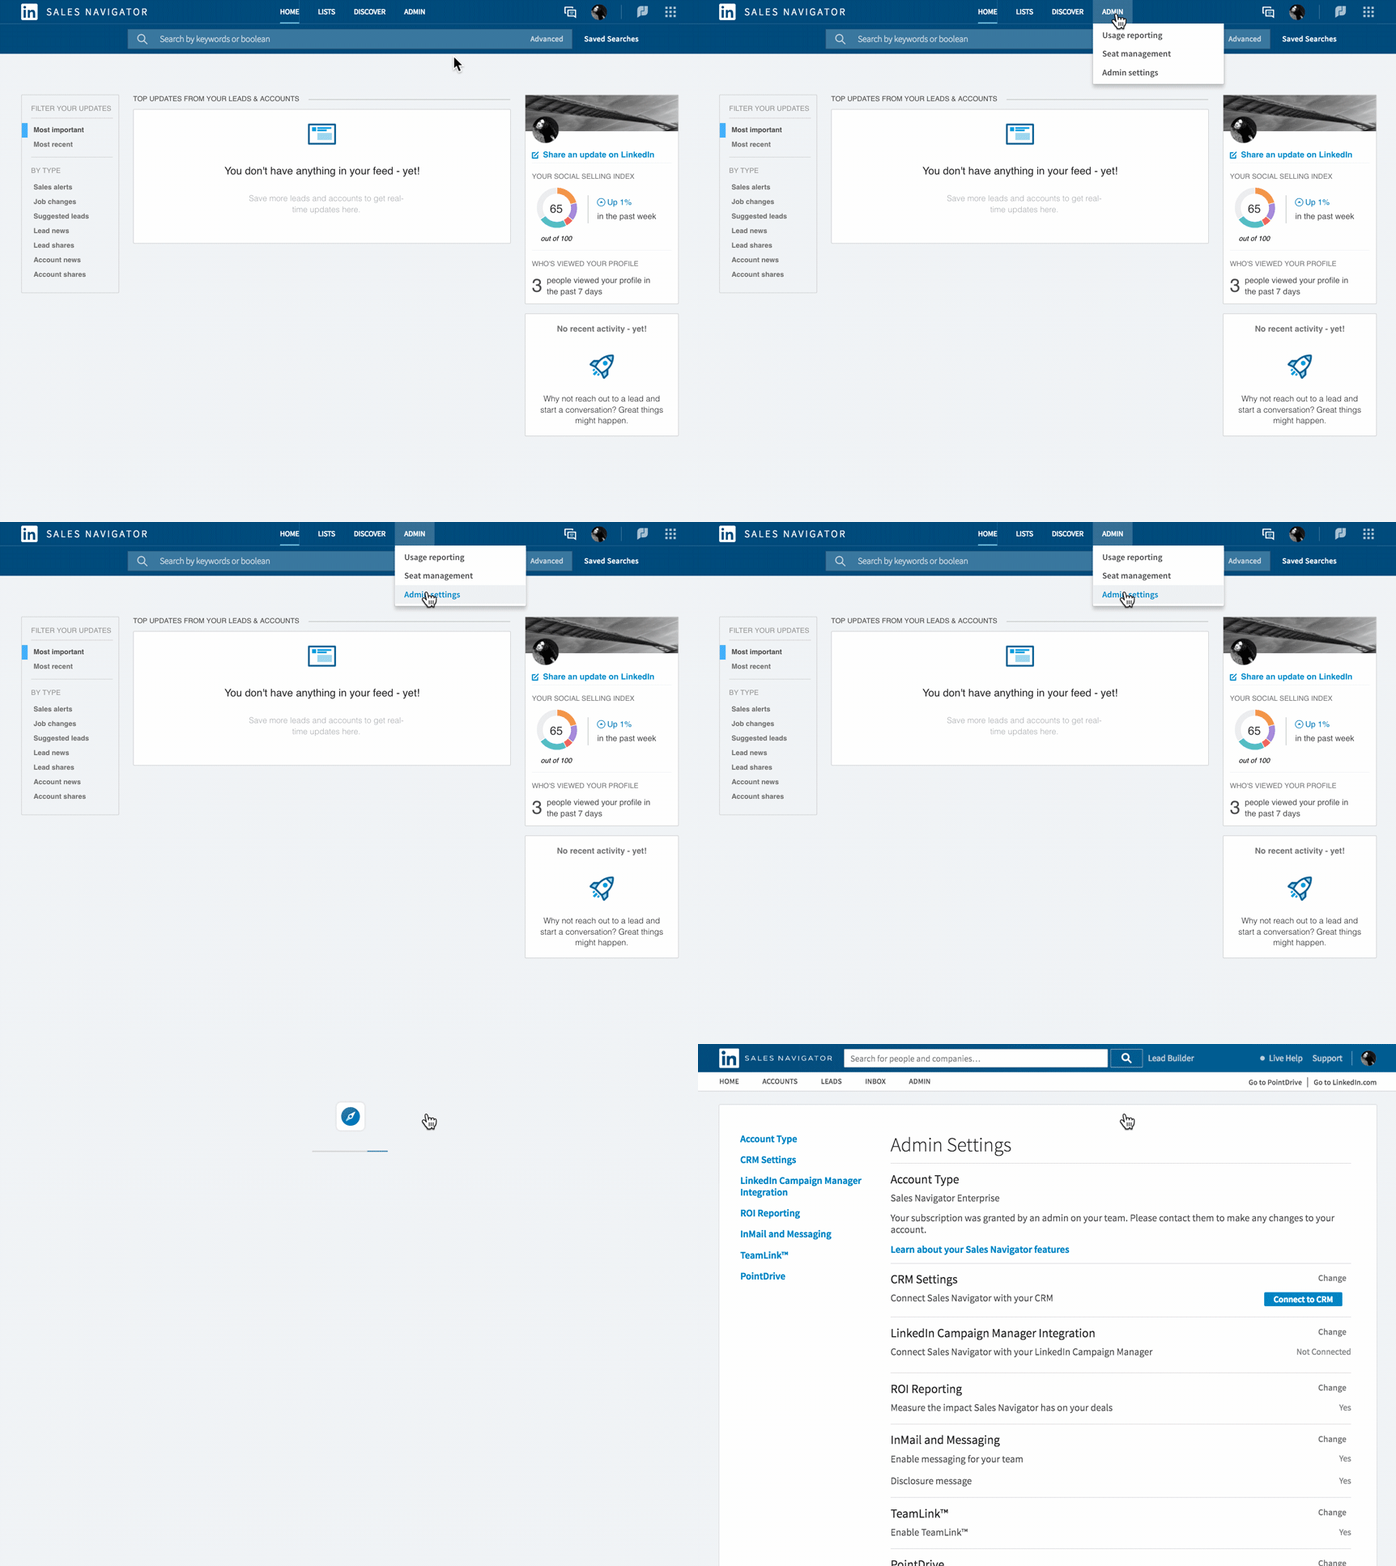
- In Sales Navigator, hover over Admin at the top of the page and select Admin Settings from the dropdown menu.
- In the CRM Settings section, click Connect to CRM.
- After logging into Salesforce, return to the Admin Settings page. In the CRM Settings section, click Change.
- Check Yes to clean up all previously imported CRM data.
- Click Continue.
Group Deactivation
- In Sales Navigator, hover over Admin at the top of the page and select Admin Settings from the dropdown menu.
- In the CRM Settings section, click Change.
- Click Disconnect CRM sync.
- A pop-up screen will appear. Check Yes to clean up all previously imported CRM data.
- Click Continue to complete the disconnection.
Individual Activation
- In Sales Navigator, hover over Admin at the top of the page and select Seat Management from the dropdown menu.
- Once on the Seat Management page, select a user you would like to give CRM Sync access to.
- Next to their profile, click on the Edit dropdown menu.
- Check the Enable CRM Sync box.
Individual Deactivation
- In Sales Navigator, hover over Admin at the top of the page and select Seat Management from the dropdown menu.
- Once on the Seat Management page, select a user you would like to give CRM Syncaccess to.
- Next to their profile, click on the Edit dropdown menu.
- Uncheck the Enable CRM Sync box.


